
canon ae 1 program manual
Canon AE-1 Program Manual: A Comprehensive Guide
This guide offers detailed instructions and insights into the Canon AE-1 Program camera, covering operation, features, and maintenance. Find manuals, parts diagrams, and resources for repair, ensuring a complete user experience.
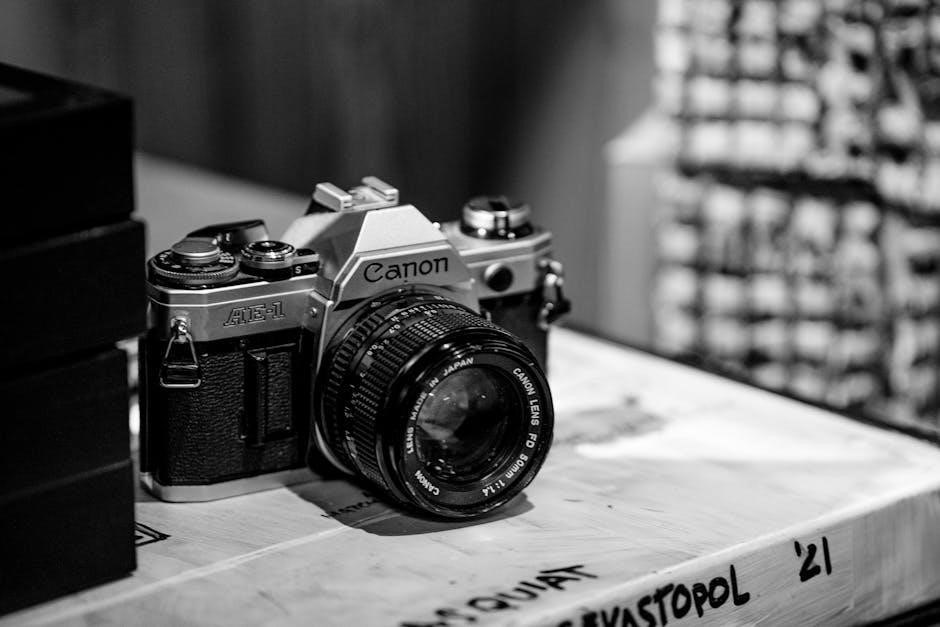
The Canon AE-1 Program, launched in 1981, represented a pivotal moment in 35mm SLR photography. It democratized advanced photographic features, making them accessible to a wider audience. Unlike previous models requiring full manual control, the AE-1 Program introduced a “Program” mode, automating both aperture and shutter speed selection based on light metering.
This innovative feature, combined with its robust build quality and extensive lens compatibility, quickly established the AE-1 Program as a favorite among both amateur and professional photographers. The camera’s popularity stemmed from its ease of use, allowing photographers to focus on composition and capturing the moment, rather than wrestling with complex settings.
Today, the Canon AE-1 Program remains a highly sought-after classic, celebrated for its reliability, user-friendliness, and the beautiful image quality it produces. This manual aims to provide a comprehensive guide to understanding and utilizing all the capabilities of this iconic camera, from basic operation to advanced techniques.
Historical Context of the Canon AE-1
The Canon AE-1, and subsequently the AE-1 Program, emerged during a significant shift in the photographic landscape of the late 1970s and early 1980s. Prior to this, SLRs were often complex, requiring extensive knowledge of exposure settings. Canon recognized a growing demand for cameras that simplified the photographic process, appealing to a broader consumer base.
Building upon the success of the original AE-1 (1976), the AE-1 Program (1981) further refined this approach by introducing a fully programmed exposure mode. This innovation automated both aperture and shutter speed, making it easier for novice photographers to achieve well-exposed images. This was a direct response to competition from other manufacturers offering similar automation features.
The AE-1 Program’s arrival coincided with the rise of color negative film and the increasing popularity of snapshot photography. Canon’s commitment to quality and innovation cemented its position as a leading camera manufacturer, and the AE-1 Program became a cultural icon, representing a new era of accessible and enjoyable photography.
Key Features and Specifications

The Canon AE-1 Program boasts a robust feature set within a compact and user-friendly body. It’s a 35mm SLR utilizing Canon’s FD mount, offering compatibility with a wide range of lenses. Core features include the innovative “Program” mode, automating both aperture and shutter speed for simplified operation, alongside aperture-priority and manual modes for experienced users.
Specifications include a horizontally-traveling, cloth focal-plane shutter with speeds from 2 seconds to 1/1000th of a second, plus Bulb mode. The camera features a CdS spot metering system, providing accurate exposure readings. It accepts standard 2 AA batteries for power. The viewfinder offers approximately 93.5% coverage.
Further notable aspects are the built-in self-timer, film advance lever, and rewind crank. The camera’s construction incorporates durable materials, ensuring longevity. Its lightweight design enhances portability, making it ideal for various photographic applications.
The “Program” Mode Explained
The defining characteristic of the Canon AE-1 Program is its “Program” mode, a revolutionary feature for its time. This mode simplifies photography by automatically selecting both the optimal aperture and shutter speed based on the camera’s internal metering system and the lens’s maximum aperture. Essentially, the camera ‘thinks’ for you, aiming for a well-exposed image in most situations.
How it works: The camera prioritizes shutter speed to prevent motion blur, then chooses an appropriate aperture. This makes it exceptionally user-friendly for beginners or those wanting quick, reliable results. However, the photographer relinquishes direct control over these settings.
While convenient, understanding its limitations is crucial. In low light, the camera will select a wider aperture, potentially resulting in shallow depth of field. The “Program” mode is best suited for general photography where precise control isn’t paramount, offering a balance between automation and image quality.

Understanding the AE-1’s Exposure System
The Canon AE-1 Program utilizes a center-weighted averaging metering system. This means the camera primarily measures light from the center of the frame, giving it the most weight in determining the correct exposure. Light from the edges of the frame is also considered, but to a lesser degree. This approach mimics how the human eye perceives light, often leading to natural-looking results.
Metering Modes: Beyond the “Program” mode, the AE-1 offers shutter-priority AE (Tv) and aperture-priority AE (Av) modes. In Tv mode, you set the shutter speed, and the camera selects the aperture. In Av mode, you choose the aperture, and the camera determines the shutter speed.
Exposure Compensation: The AE-1 also features exposure compensation, allowing you to override the camera’s metering decision. This is useful in challenging lighting situations, like snow or backlit scenes, where the camera might underexpose the image. Understanding these elements is key to mastering the AE-1’s exposure capabilities.
Components of the Camera Body
The Canon AE-1 Program body is comprised of several key components. The top deck houses the shutter speed dial (in Av mode), the mode selector (Program, Av, Tv, and Manual), the film advance lever, and the rewind crank. The viewfinder provides a clear view of the scene, along with essential exposure information.
On the rear panel, you’ll find the film rewind release button, the film counter, and the battery compartment. The bottom features the tripod socket and film loading mechanism access. The lens mount, a Canon FD mount, securely connects lenses to the camera body.
Internally, the circuitry controls the exposure system and other functions. The shutter mechanism regulates light exposure, and the metering cell measures light intensity. Familiarizing yourself with these components is crucial for understanding the camera’s operation and performing basic maintenance.
Lens Compatibility and Mount
The Canon AE-1 Program utilizes the Canon FD (Focusing Distinctive) lens mount. This mount is compatible with a wide range of FD lenses produced by Canon, offering various focal lengths and maximum apertures. It’s important to note there are two main FD variations: the earlier non- breech-lock lenses and the later breech-lock lenses.
Breech-lock lenses feature a locking pin for a more secure connection, generally preferred for their ease of use. Adapters are available to use lenses from other mounts, but may compromise functionality like aperture control. When selecting a lens, consider its focal length for your intended photography style – standard, wide-angle, or telephoto.
Ensure the lens is properly seated and locked into the mount before operation. Inspect the mounting surfaces for any debris or damage. Proper lens compatibility and secure mounting are essential for optimal image quality and camera performance.
Loading Film into the Canon AE-1
Loading film into the Canon AE-1 Program is a straightforward process. First, open the camera back by sliding the film release lever. Insert the 35mm film canister into the left side of the camera chamber, ensuring it seats correctly. Pull the film leader across the camera and attach it to the take-up spool on the right side.
Advance the film using the film advance lever, observing the rewind knob turning to confirm the film is engaging. Close the camera back securely. The AE-1 automatically resets the frame counter to ‘S’ when you close the back. Advance the shutter twice and the counter will display ‘1’.
Always ensure the film is loaded correctly to prevent damage to the camera or loss of images. Rewind the film completely before opening the back to avoid light leaks.
Using the Viewfinder and Focusing
The Canon AE-1 Program’s viewfinder provides a clear view of your subject and essential shooting information. Within the viewfinder, you’ll find the focusing aids – a split-image rangefinder at the center and a microprism collar surrounding it. To achieve sharp focus, align the two images in the split-image rangefinder.
When the subject is in focus, the split images will merge into one solid image. Alternatively, use the microprism collar; when focused, the grain within the collar appears still. The viewfinder also displays LED indicators for exposure, showing if your image is underexposed, correctly exposed, or overexposed.

Practice using both focusing methods to determine which suits your shooting style best. Remember to keep your eye level and steady for accurate focusing and composition.
Metering System and Exposure Control
The Canon AE-1 Program utilizes a center-weighted averaging metering system. This means the camera prioritizes the light reading from the center of the frame, while still considering the surrounding areas. LED indicators within the viewfinder are crucial for exposure control – a “+1” indicates overexposure, “0” signifies correct exposure, and “-1” suggests underexposure.
In “Program” mode, the camera automatically selects both the shutter speed and aperture based on the light reading. However, you can override this by switching to shutter-priority (Tv) or aperture-priority (Av) modes. The AE-1 also features exposure compensation, allowing you to fine-tune the exposure if the camera’s reading is inaccurate due to challenging lighting conditions.
Understanding these indicators and modes is key to consistently achieving well-exposed photographs with your Canon AE-1 Program.

Shutter Speed and Aperture Settings
The Canon AE-1 Program offers versatile control over shutter speed and aperture, even within its automated “Program” mode. Shutter speeds range from 2 seconds to 1/1000th of a second, influencing motion blur and light capture. Aperture, controlled by the lens, dictates depth of field – the area in focus.

When not in Program mode, you can manually set either shutter speed (Tv mode) or aperture (Av mode), with the camera calculating the corresponding setting for optimal exposure. Understanding the relationship between these two settings is fundamental to photographic control. A wider aperture (lower f-number) creates a shallow depth of field, ideal for portraits, while a narrower aperture (higher f-number) maximizes depth of field for landscapes.
Experimenting with these settings allows you to creatively control the look and feel of your images using the Canon AE-1 Program.
Battery Installation and Maintenance
The Canon AE-1 Program relies on a 4LR44 or equivalent 6V battery to power its electronic functions, including the light meter and electronic shutter. Battery installation is straightforward: open the battery compartment located in the camera’s base and insert the battery with the correct polarity (+/-). Ensure a secure connection for reliable operation.

Proper battery maintenance is crucial for consistent performance. Always use high-quality batteries to avoid potential leakage or damage. Remove the battery if the camera will not be used for an extended period to prevent corrosion. Avoid exposing the battery to extreme temperatures or humidity.
A weak battery can lead to inaccurate metering or failure of the electronic shutter. Regularly check the battery level using the viewfinder indicator. Replacing the battery proactively ensures your Canon AE-1 Program is always ready to capture stunning images.
Troubleshooting Common Issues
Several common issues can arise with the Canon AE-1 Program. If the shutter doesn’t fire, check the battery, ensure the film is loaded correctly, and verify the shutter speed dial isn’t set to ‘B’ or ‘Lock’. Inaccurate metering often points to a weak battery or a dirty light sensor – gently clean the sensor with a soft brush.
If the viewfinder is dark, confirm sufficient ambient light and check the aperture setting. Erratic behavior can sometimes be resolved by resetting the camera by removing and reinserting the battery. Film advance problems may indicate a mechanical issue requiring professional servicing.
Remember to consult the Canon AE-1 Program manual for detailed diagrams and troubleshooting steps. If you’re uncomfortable attempting repairs yourself, seek assistance from a qualified camera technician to avoid further damage. Regular maintenance can prevent many of these issues.
Basic Operation: Taking Your First Photo
To take your first photo with the Canon AE-1 Program, begin by installing batteries and loading film (refer to dedicated sections in the manual). Set the mode dial to ‘Program’ for automatic exposure. Look through the viewfinder, aligning your subject with the focusing points. Gently press the shutter button halfway to activate the metering system and achieve focus.
The camera will automatically select the appropriate shutter speed and aperture. Once focused, press the shutter button fully to capture the image. Remember to advance the film after each shot using the film advance lever. Practice these steps to become familiar with the camera’s operation.
Consult the Canon AE-1 Program manual for detailed illustrations and explanations of each step. Experiment with different subjects and lighting conditions to understand how the camera responds. Don’t be afraid to make mistakes – learning through practice is key!
Advanced Techniques: Depth of Field
Depth of field (DoF) refers to the range of distance within a photograph that appears acceptably sharp. The Canon AE-1 Program allows control over DoF through aperture settings. A wider aperture (smaller f-number, like f/2.8) creates a shallow DoF, ideal for isolating subjects with blurred backgrounds.
Conversely, a narrower aperture (larger f-number, like f/16) yields a greater DoF, keeping more of the scene in focus – perfect for landscapes. While in ‘Program’ mode, the camera selects the aperture, limiting direct control. Switching to ‘Av’ (Aperture Priority) mode grants manual aperture adjustment.
Understanding the relationship between aperture, focal length, and subject distance is crucial. Refer to your Canon AE-1 Program manual for detailed charts and examples. Experiment with different settings to master controlling DoF and enhance your photographic storytelling.
Advanced Techniques: Using External Flash
The Canon AE-1 Program offers a hot shoe for connecting external flash units, expanding creative lighting possibilities beyond the built-in flash limitations. Using an external flash provides greater power, control, and versatility. Ensure compatibility with the camera’s sync speed – typically 1/60th of a second – to avoid dark bands across images.
TTL (Through-The-Lens) flash metering, if supported by your flash unit, automates exposure settings for balanced illumination. Manual flash mode allows precise control over flash output, requiring experimentation to achieve desired results. Bounce flash, directing the flash head towards a ceiling or wall, creates softer, more natural lighting.
Consult your Canon AE-1 Program manual and the flash unit’s instructions for detailed guidance on settings and operation. Remember to adjust ISO accordingly when using flash, and practice to master flash photography techniques.
Understanding the AE-1’s Self-Timer
The Canon AE-1 Program features a built-in self-timer, useful for self-portraits or situations requiring a delayed shutter release. Located near the shutter button, the self-timer is activated by moving the lever to the ‘Timer’ position. This initiates a roughly 10-second delay before the shutter fires, allowing you time to compose yourself in the frame.
After activating the self-timer, a small red lamp on the front of the camera illuminates, indicating the countdown is in progress. To cancel the self-timer before it triggers, simply move the lever back to the ‘On’ or ‘Off’ position. The self-timer is a valuable tool for group photos where you want to be included, or for minimizing camera shake when using slower shutter speeds.
Refer to your Canon AE-1 Program manual for specific details and troubleshooting tips regarding the self-timer function.
Canon AE-1 Program Parts Diagram
A Canon AE-1 Program parts diagram is an invaluable resource for understanding the camera’s internal components and facilitating repairs or maintenance. These diagrams visually identify each part, from the shutter mechanism and metering system to the film advance lever and viewfinder components.
Diagrams are readily available online through resources like ManualsLib and various photography enthusiast websites. They are particularly helpful when disassembling the camera for cleaning, servicing, or replacing damaged parts. Identifying the correct part number is crucial when ordering replacements.
Understanding the diagram allows for a more informed approach to camera repair, preventing accidental damage or incorrect reassembly. Websites specializing in vintage camera parts often provide detailed, high-resolution diagrams alongside their component listings. Always consult the Canon AE-1 Program manual in conjunction with the parts diagram for accurate identification and assembly instructions.
Where to Find the Canon AE-1 Program Manual
Locating a Canon AE-1 Program manual is essential for maximizing your photographic experience with this classic camera. Several online resources offer downloadable versions, including ManualsLib, which hosts a digital copy of the English edition instruction manual. These digital manuals provide comprehensive guidance on all camera functions.
Websites like Majlesi-furniture.com sometimes list instruction manuals for sale, though availability can vary. Additionally, photography forums and online communities dedicated to vintage cameras often have links to downloadable manuals or can direct you to reliable sources.
Geneticode.in also appears as a potential source, though verifying the legitimacy of downloads is always recommended. Remember to exercise caution when downloading files from unfamiliar websites. A physical copy can be found through online auction sites or vintage camera retailers, offering a tangible resource for learning and reference.
Resources for Repair and Maintenance
Maintaining a Canon AE-1 Program requires access to reliable repair resources. While finding dedicated AE-1 repair specialists can be challenging, several avenues exist for keeping your camera in optimal condition. Epilstart.ru lists Canon service manuals, which, while geared towards professionals, can offer valuable insights into the camera’s internal workings.
Online photography forums, particularly those focused on vintage cameras, are excellent places to seek advice from experienced users and locate potential repair technicians. These communities often share knowledge about common issues and recommended solutions.
Parts availability can be limited, but websites specializing in vintage camera parts may carry components for the AE-1. Regular cleaning and careful handling, as detailed in the camera’s manual, are crucial preventative measures. Consider professional servicing for complex repairs, ensuring the longevity of your Canon AE-1 Program.
Canon AE-1 Program: A Collector’s Perspective
The Canon AE-1 Program holds a significant place in photographic history, making it a popular choice among collectors. Released in 1984, it represented a refinement of the original AE-1, adding a fully programmed exposure mode that simplified operation for amateur photographers. Its robust build quality and reliable mechanics contribute to its enduring appeal.
Original, well-maintained examples, complete with the original box and documentation, command higher prices. Collectors often seek cameras in excellent cosmetic condition, with minimal signs of wear. The availability of a wide range of Canon FD lenses further enhances its desirability.
Finding a complete Canon AE-1 Program manual is a boon for collectors, adding to the historical context and value of the camera. The AE-1 Program’s blend of innovation and accessibility cemented its status as a classic, ensuring its continued appreciation by photography enthusiasts and collectors alike.
Cleaning and Storage of Your Canon AE-1
Proper cleaning and storage are crucial for preserving your Canon AE-1 Program. Regularly use a soft brush to remove dust from the body and lens. Avoid abrasive cleaners or solvents, as they can damage the finish. A gentle lens cleaning cloth is ideal for the lens elements, using lens cleaning fluid sparingly.
The film chamber should be periodically inspected and cleaned to prevent mold growth. Ensure the battery compartment is free from corrosion. When storing the camera, remove the batteries to prevent leakage. A cool, dry place, away from direct sunlight, is best.
Consider using a camera bag or case for protection. Long-term storage benefits from the inclusion of a desiccant packet to absorb moisture. Following these simple steps will help maintain your Canon AE-1 Program’s functionality and appearance for years to come, safeguarding your investment.